
Materials:
- 1 Diode
- 1 Thermistor
- 1 Capacitor
- 1 Serial cable (or plug)
- 2 Plastic bottle caps (one slightly bigger than the other)
The Circuit
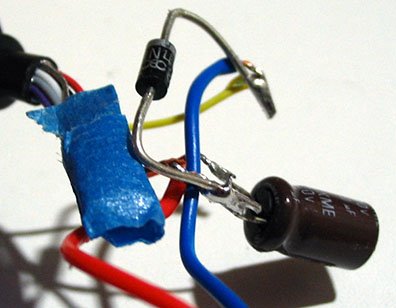
 I salvaged all the parts from old electronics (found in garbage) so they were free. All the parts are very easy to find except for the thermistor. I did not get precisely a thermistor but a very close approximation to it. In fact, I’m not very sure of what it is that I used.
I just soldered the components together, no need of PCB.
 My Thermistor
I got the thermistor form a broken drinking water dispenser /cooler.
The relationship between the temperature and resistance in an usual thermistor is mostly linear. For my thermistor, the lower bound for the linear region of the resistance-temperature relation is 11°C. Below this point, its resistance goes to infinity (is doesn’t allow any current to pass). I suppose this is used to stop cooling the water when it gets at the desired 11°C temperature. I haven’t yet found an upper bound for the liner region.
 Anyways, the only problem is that it can’t measure temperatures below 11°C.
The Case
To build a nice looking case, I simply used two plastic bottle cap (from a Propel and Powerade bottles) that my girlfriend brought me from the recycling bin at her job (a gym).
 These two caps happen to fit perfectly one inside the other. So I simply cut a hole for the cable and drilled another for the probe (MT). I placed the circuit (properly insulated with tape, of course) inside, closed it and the thermometer was done.
 The Software
In order to run use the thermometer you need a small program. I used the program provided in the original project but it wouldn’t be hard to right a new one or to improve the existing one.


No comments:
Post a Comment